Monday, February 25, 2013

Sunday Read: The Patience Stone by Atiq Rahimi


Going through my flipboard updates, Newsweek had a story on a debut film ' The Patience Stone'. I thought it would be interesting to read something written by an author who belongs to a known territory. Atiq Rahimi fled to Pakistan in 1984, and at the French Embassy in Islamabad requested asylum.
“Exile, despite everything, gives us a certain liberty, a certain distance with regard to our culture. And a critical eye,” he says. “It’s very creative.”

I had my book delivered this last friday while I was leaving for a " too bored, lets go Shopping in the other end of the City  trip" The bus was late. I opened the book package from amazon.

Forword:

From the body by the body with the body
Since the body and until the body
Antonin Artaud

Took the bus to the train station..the escalator was faulty..had to wait for someone to carry the push chair down for me..missed the train..continued with the book while waiting.

Introduction written by Khaled Hosseini ( author of The Kite Runner )

It reads....
"It is a vexing fact that women are the most beleaguered members of Afghan society......"

"..Atiq Rahimi gives face and voice to one unforgettable woman- and, one could argue, offers her as a proxy for the grievances of millions."

I read it on the train too, it is a slim book. This post is turning into a novel on its own:p..I just wanted to share the experience and not to write a book Review

The book was written in French originally..Rahimi says that writing it in his aquired language rather than Persian or Dari liberated him from the social taboos that involuntarily obstruct him to express freely when writing in Persian.

Leaving the unfiltered content aside, the message was clearly conveyed. An indestructible soldier  lies on the floor in coma, nursed by his wife of ten years.

'The man is not laughing, and yet it seems as if he is holding back a laugh. This gives him a strange expression, that of a man inwardly mocking those who look at him.'

Rahimi brilliantly uses the metaphor of a Sang e Sabur for this corpse of a man; the black Stone which absorbs all confessions, secrets and formerly unspoken thoughts of a person till the day of judgement when it finally explodes. The book ends with an explosion..with a dead man in the room and a dead but free soul of a woman who finally spoke infront of the stone, after a lifetime of being, in Hosseini's words
'objectified, marginalised, scorned, beaten, ridiculed, silenced.'
My last thoughts on the book are that its not just in  Afghanistan where women 'suffer the most, and cry out the least'. The heroine of the book is not the nobelest of beings..and her turning towards the demon,( however unjustifiable ) to fill the blanks of her childhood, her marriage and her life experiances are the reality of  not just a war torn Afghanistan. Its a human reality in Aghanistan or elsewhere.
The book has been filmed too..directed by the author himself..not so keen on watching it because I killed my appetite to see a book turned into  a film when I watched the Harry Potter movie for the first time. That was it:p


Saturday, February 23, 2013

Rekindling An Old Flame

We all go through a 'candle hoarding' phase in life. Or is it just me?
Anyhowz, I got these two blocks of candles when damask was a viral pattern.
I foolishly put them on the window slab over the heating..and the obvious happened. They melted on themselves.

I melted the chunky fellow in an old pot..and poured the wax in a vintage Earl Grey tin.

To make the wick I used regular yarn and used a kitchen clip to hold it over the tin.
Voila! A new accent candle which actually goes with my current color Obsession.
To cover the brand name I used a chalk board sticky label.

Wednesday, February 20, 2013

Wooden Spoon Swoon !

So you get up one day, and before you fix yourself or your poor little two year old breakfast..you realize that your wooden spoons are too boring and need some blog worthy treatment !


As simple as it can get..just tape n' paint. Use sealer when it dries.


Don't worry, they don't always stay in a surgical order..check how I made my new draw liner in the next post!

Finally, I can die peacefully, after having my own painted wooden spoons in my kitchen.

Monday, February 18, 2013

Kare Design Knock off Clock

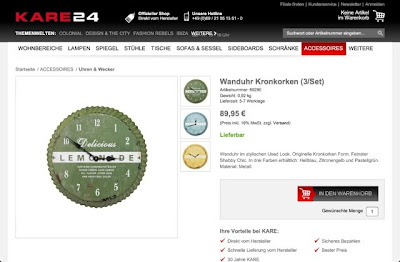
We had been living time-lessley in our living room for almost 6 months..my son whacked my dear grandfather clock on the floor and managed to wrangle its arms..laziness or maybe choosiness prevented me to replace it..until I saw this at our local Kare outlet.


€89.95 for a set of wall clocks...I said to my husband, I like them, can I have them *insert sad puss in boots eyes* and he was so nice to say ...'uhh if you like them..buy them'. I was just KIDDING..I had other plans ! I know he has no love for the distressed/rusty look but still for him to say that was far too kind. This is my Version:

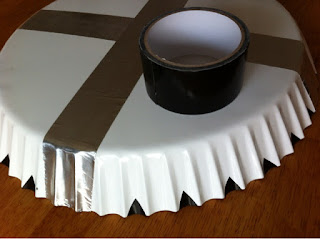
I got this big flan dish for a mere € 3.50 in sale from Depot. I used it to serve meetballs on my son's birthday..but I did a lil cheating there..this dish was not meant to serve food..it was a decorative item..but for that price and that size..I had to.
?=


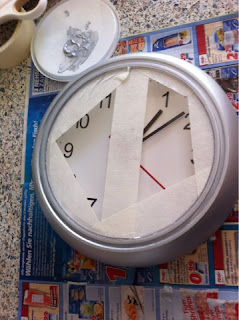
This wall clock, Ikea Rusch is just €1.99. It had been in my kitchen since forever. I painted it with some silver craft paint.

So I got the inspiration from Kare but the motivation to go for it from Kammy at Kammy's Korner.

I wanted to keep mine really simple..and not like the original one..because thats not really our style.

I went for less is more, added some silver tape ( on hand ) in to stripes..and to give the edges an outline I used some black tape snipped into triangles.

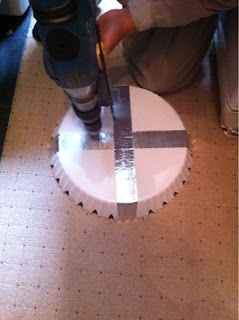
To attach the clock I asked my Handy man to drill a hole in the flan. I made another hole in the plastic clock and used wire to attach it to the metal dish.

I love the size, perfect for the living room!


For a total cost under €6, and that too with everything already on hand I can't complain !

Bottom line... Time is Money!


Wednesday, February 13, 2013

Updating a Jewellery Vanity

This baby hutch had been bothering me for quite sometime now. It was a gift and actually did serve its purpose for storing all the gold I had after getting married...but now after 3 years I decided to give it a new face.

After stepping into blogland..the one thing I totally love is the furniture updating projects that so many talented ladies out there handle on their own..I greatly lack skills to paint and finish off a piece of furniture. I just hope someday I can come over the alienness of painting a simple chair.
I thnk the problem is..I don't have enough knowledge about the correct materials needed for a paint job, ánd I am impatient too. Like this Vitrine, I tried painting the insides in a watered down blue..and the patience ran out..i did not finish it with any sealer..and it has started to chip. FAIL
Coming back to the jewellery vanity..
I was too lazy to sand it..or prime it !!
I just spray painted it with white. 4 thin coats and a coat of sealer.
I tapped the glass with white painter's tape.
Finished it off by painting the drawer knobs with a dull gold paint marker.
I learned that the paint marker wont work on the Latex paint for the stripe I added on the bottom drawers, so I used a textured acrylic paint instead.
Gold and white--a little bit like the 70's ! But, did'nt I say 'UPdating' ? Oh, well I have noticed a lot of seventies furniture making a come back!


Monday, February 11, 2013

Simple Patterned Cushion


Today I've got a no brainer kind of a cushion cover to show. This was a plain pillow case which I had stitched to practice my basic sewing some time back. The fabric has a grid pattern in self print ( repurposed bed sheet ) so I just followed the pattern and went on criss-crossing with a fabric marker.
Quick and easy peasy!

I would've second guessed myself if I had not seen IKEA selling this.


In other news, this past week I made an Angry Bird cake for a friend's son. No fine pattissiere going on there..just a fun way to wish a 3 year old his birthday!
A VERY Angry Bird indeed hahaha

Wednesday, February 6, 2013

Favorite Pyjama Upcycled !

Here I am again not wanting to throw away my little man's out grown pyjamas! He LOVES them!
We did the same thing to our favorite cookie monster shirt..which you can find HERE..and till now its our favorite bag to carry whenever we leave the home!

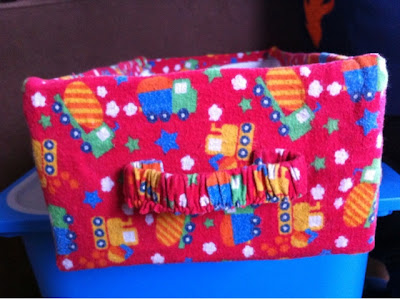
I have bins from Ikea for toys but I made this to kind of motivate him to put his cars in one box and not in his boots, inside pillow cases, under the sofa cushions or the carpet !

Its not the neatest i could do...infact I did it 'while' I was tidying the toys up..that kinda quick whip project.

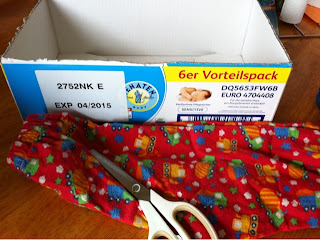
A box, a pyjama and hot glue are all you need.
I even used the elasticated waist band to make the handles on both sides!


Call me frugal..I'll take that as a compliment !


Saturday, February 2, 2013

Dressing Up a Table

I enjoy cloth napkins , place covers. sparkling cutlery etc but in the Hula Hula of our busy lives  we only get to enjoy the 'proper' dinning etiquette at fine restaurants or in a Home-Economics course! Otherwise, if I tell you the truth..in our home bringing the steaming pot itself to the table and soiling as less dishes as possible is considered pretty OK.
However, I do like to set up the table for guests. I keep on playing around with things.
Normalerweise, our guests are families with small kids..so you have to keep it practicle.


You can find how I did my chairs HERE.
Got the red place mats for a Euro each in Christmas sales!
The plates were also mix n match pieces from another sale!!
The tablecloth is a finely made cross stitch that I found in the neighbourhood too!
Napkins are plain old paper ones, folded nicely.

DIY Tuffted Ottomon

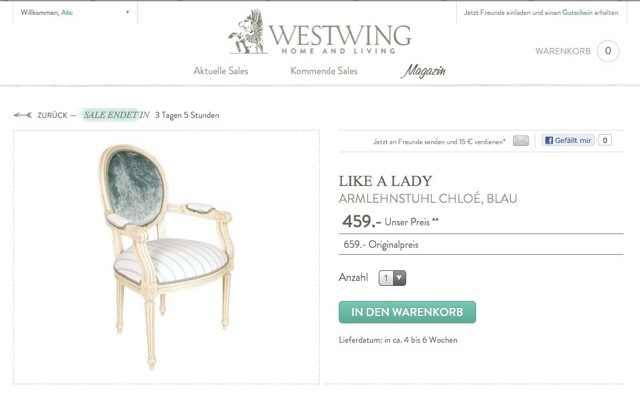
Last week in my email I got some mouth watering furniture deals. Newsletters like these make me squeal out loud...who the hell would pay so much for a chair. ONE chair! No disregard to those who can, I love it and if someone else is paying I wouldnt mind having it :p

Teals, blues, aquas are my current colour preferences. Seeing the images above I was reminded of the fabric I had bought last year..I had regretted buying it later that day..seeing no use for it and feeling guilty of impulsive buying..but who knew. 

I had been planning to do a tuffting project ever since I stepped into blog land..but I didnt quite know what to make. That thing was laying right under my feet all that time..the old foot stool that I had! 

Supplies:

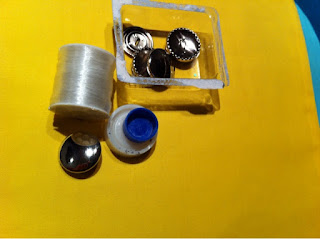
  • An awkward mushroom shaped foot stool.
  • Glue Gun
  • Adhesive Spray
  • Button Upholstering Kit
  • Super Long Needle
  • Nylon Thread
  • Fabric
  • Staple Gun ( mine stopped working, so I didnt use it)


  • I measured the fabric needed for the sides and for the top. Cut it-
  • I cut open the bottom of the footstool to take a peek.

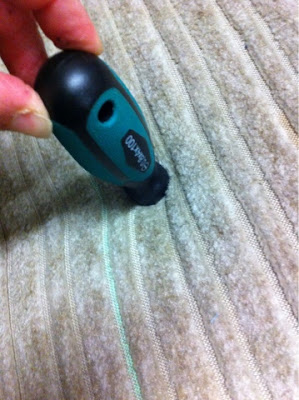
  •  I marked the top of the foot stool for the tufts.  I inserted a pointy screw driver down the 'seat' of the stool..all the way down so that I had holes visible on the underside of the stool.


  • To Keep it short I covered my Buttons, and did the tuffting...I looked for the many tutorials online for guidance on threading the needle etc.


I did the top and the tuffting first and then covered the sides.
For the sides I took the no sew, no stress way..I hot glued it ! I turned the fabric edges over and hot glued them for a neat 'seam'. Then went on covering the foot stool, using spray adhesive to set the fabric. Corners were tough to handle but I did them just like I would wrap a present.


 Feels G0o0oood ! Oops will someone get me the remote control !